One of the principal components of writing an AI is teaching it how to steer. I’m not talking about the physics of turning a rigid body, I’m talking about the intelligence of knowing how much to turn to face your target. Turn too hard for too long and you’ll go too far, brake too soon and you will stop too soon. There is a magic solution that will allow you to turn as fast as possible until the perfect moment when you can hit the brakes. The magic solution needs to deal with the fact that the “perfect moment” usually happens between two time steps. This tutorial is about finding that magic solution.
The Problem
I first ran into this problem when I decided I wanted to put guided missiles into Rift, but couldn’t figure out how to steer them. The problem wasn’t a math thing, it was just a logic thing. How do you steer in space? It’s such a different problem then how you do it on Earth. I asked a few friends to describe how they turn to look at something. The answer is always about the same, you turn until you’re facing it and then you stop. But of course, in space, with no friction, there is no “stop.” You can apply a thrust to turn left, apply a thrust to turn right, or apply no thrust. In order to “stop” you must turn against your motion until you aren’t moving. If you turn too much, you’ll start moving in the opposite direction. So an answer starts to take shape. In space, to turn to face a target, you must turn towards the target for some amount of time, and then you must turn in the opposite direction until you stop. Sounds good, but leaves a tons questions unanswered. How fast do you turn in either direction? And most importantly, when do you start to turn against your motion?
Step 1 – Get it Straight
The first thing to do when tackling the problem is realize that rotational physics is hard. Or at least it is for me. I find the idea or “angular acceleration” very uncomfortable. I mean I understand it, but I don’t “feel” it the way I do with linear physics. Moving at 100mph feels fast, I don’t have to think about it. Turning at 1.8 radians per second? I have no idea if that’s fast or slow. I’d have to spin around in my desk chair for a while to get a feel for it. So one of the bigger mental leaps for me was to realize that the equations for rotational physics are the same as linear physics. If you swap angle for distance, angular acceleration for acceleration, etc etc you can change the whole problem to one of moving in a straight line. So with that in mind, hit the reset button on this post and think about it again in terms of motion on a straight line. Let’s say that the problem now is one of trying to move in a straight line and stop on a specific point. In this case you can either thrust forward or backward. If you apply too much forward thrust you will fly past your point. If you apply too much back thrust you will stop too early. Make sense? Make more sense then turning? It does for me, and if you can solve this problem then it’s an easy thing to change your units back into rotational ones and your steering will be solved too.
Step 2 – The Problem of Time
Now that we’ve simplified it by straightening it out, let’s complicate it by adding a strobe light. Unfortunately in a video game your AI and physics loops aren’t running all the time. Time is not fluid, but happens in discrete instants, once every time step. If the time step is small enough and the object is slow enough, this isn’t really an issue. But when trying to steer something fast and light like a guided missile, it’s a huge pain in the butt. In general we want to accelerate until we brake. That’s simple in fluid time, but if the perfect time to brake turns out so be at some point between now and the next time step then what do we do? If we speed up we could go too far, if we brake now we could stop too soon, if we coast then who knows? We need to figure out how much force to apply. And that’s really the major part of this solution.
Step 3 – The Solution in English
Before I start to dive into all the math and physics of this thing, I’d like to describe the solution I’ve come up with in English. Armed with this high level view of the situation you should be able to keep in mind what we’re solving. Every time step the game gives us the physical information about our missile, where it, how fast it’s going, it’s maximum acceleration, etc etc. And of course we know where we want to stop. The last two key pieces of information are the time step, and the ability to see into the future a bit. The second part sounds like a tall order, which is why I already covered it in my previous post, “Seeing the Future.” Now we have all the pieces we need to describe the solution. From the highest level the solution is this, Accelerate as fast as possible toward the destination, then brake as hard as possible so that you end up stopped exactly on target. That’s correct, but not useful, so let’s break it down further.
Start by figuring out how long it will take to hit the target at full acceleration. Next figure out how long it will take you to come to a complete stop. If both of those numbers are less then the time step then you are moving very slowly right next to the destination. You simply apply a tiny amount of force (we’ll see how much later). If we’re not in that case (usually we won’t be) then we’re further from the target. Figure out our stopping distance, how far we would travel under full brake. If this distance is greater then the distance to the target then we’ve already overshot our mark (or the target moved) and we need to hit the brakes now, so apply full break. If that’s not the case then we can keep going fast. Next we look into the future a bit (again, specifics on this in my last post) to see how we’d look if we accelerated as hard as possible for the next time step. Now get the stopping distance of our future self. If that stopping distance is still less then the total distance then it’s safe to accelerate as hard as possible, so that’s what we do. If not then we’re in the real problem point. In this situation it looks like if we apply full brake we’ll stop short, but if we apply full thrust we’ll overshoot. So we need to apply a partial thrust or brake.
That sums up the solution. I’ll be referring back to it often, so consider reading it again if it’s still fuzzy. Now on to the pieces we need to solve it.
Step 4 – The Players
Let’s start looking at the important parts that will make up our solution. First and foremost, we’ll need some equations. For this I turned to the good old Equations of Motion I learned in high school. I also make use of F=ma, which I hope you don’t need a Wiki link for (it’s Newton’s second law). And rounding out the High School set, you’ll need the Quadratic Equation. You’ll also need an integrator, as described in my last post. And of course you’ll need some information about yourself. Position, velocity, max acceleration, and mass (which is the only one that doesn’t easily convert to rotational physics, where’s it’s the “Inertial Tensor”). Armed with these we can start to build up the math behind the solution.
Step 5 – Minor Functions
There are a handful of functions that I sort of referred to in the English section of this tutorial. These are little things, just a couple of lines each that are derived from just flipping the Equations of Motion and Newtown’s Second around a bit. I mention them here because they have specific meaning in the solution. For simplicity I’m gonna write them for linear physics, but of course they’re the same for rotational physics.
- flo
at TimeToMoveBy( Offset ) – Assuming full acceleration, how long would it take to move by the specified amount. You can solve this by using second law of motion on the wiki page. s-si is the offset, v is your current velocity, and a is your max acceleration. Use the quadratic equation to solve for t.
- float TimeToStop() – Assuming full deceleration, how long would it take you to stop? Use the first law of motion. v is zero (stopped), vi is your current velocity, a is your max deceleration. Solve for t.
- float ForceToMoveBy( Offset, Time ) – Your mass (again, it’s trickier for rotation, it’s Inertial Tensor) is a given. For this one you want to figure out how much acceleration you would need to move by Offset in the allotted time. Use the second Equation of Motion to solve for acceleration. From that you can use F=ma to solve for F (the answer). For rotation it’s Torque = InertialTensor * RotationalAccel.
- float ForceToStop( Time ) – Same idea as before, but simplified. You can find the acceleration by simply using the first Equation of Motion with vi being your current velocity and v being 0. Once you have the acceleration, use F=ma to find the force.
- float StoppingDistance() – Use the second Equation of Motion from the Wiki page. The distance we want is (s-si).
- An integrator – This one isn’t trivial, but you need it to see into the future. My previous post directs you to a great article on Gaffer on Games. Make sure you’re comfortable with that.
And that’s it for the minor functions. Head back to the “Solution in English” part to see how they fit in. The ForceToMoveBy and ForceToStop aren’t directly mentioned in the solution, but we’ll use them in the next section.
Step 6 – Micro-Thrusts
From the Solution in English you can see that the first thing we look to see is if we’re really almost there. We start by figuring out how long it will take to get to the target, and how long it will take us to stop. If we can do both within the time step then we’re really close and moving very slow. However we can’t just do nothing. If you solve this part of the equation incorrectly then your object will always get close to where it should be and then just kind of wiggle around the point. So we need to come up with the tiny little forces that will really lock us on to the target. This is where the ForceToMoveBy and ForceToStop come into play. If the TimeToStop is greater then the TimeToMoveBy then we’re going a bit too fast. In this case we apply the ForceToStop(). If the TimeToMoveBy is greater then the TimeToStop then we’re a bit slow. In this case I apply ForceToMoveBy( Distance/2 ). Why do I divide that by 2? Well because I reasoned that if we want to travel to a point we have to speed up for half the distance and then stop for the second half. This probably isn’t as accurate as it could be, but in practice it works great. So now we’ve solved what to do when we’re really close.
Step 7 – The Math
Okay, here comes the big part. Again, look back to the Solution in English. We now know what to do when we’re close to the target, we have to worry about how to get close. We have the formulas that can tell us our stopping distance, both now and at the next time step. Our CurrentStoppingDistance is how long it will take us to stop right now if we hit full brake. If that’s longer then the distance to the target, then we’ve gone too far and we need to stop. The NextStoppingDistance is a little bit trickier, but not much. We use the integrator to figure out our position and velocity at the next time step if we apply full acceleration. Now we figure out our stopping distance from that point. If our future position plus our future stopping distance are less then our distance to the target, we can accelerate fully. All good so far, but what do we do for the “else” case, the case where it’s too soon to stop, but if we accelerate we will overshoot?
I’m going to talk you through my solution and show the math (scans of the paper I wrote on). If you’re not interested then you can skip this part. I’ll be showing the code soon enough. The reason I’m dwelling on the derivation here is that it was freaking hard for me to come up with. Took hours and a lot of paper. Maybe it’s obvious to some people, but it isn’t to me, so I assume it isn’t to everyone.
I started out by considering three moments in time: 0, 1, and f. 0 is now, the current time. 1 is the time after one time step. f is the final time, which is when we come to a full stop on the target. What we want to do is apply some force at time 0 so that by time 1 we will be at a position and velocity where we can full accel or full brake to time f. If you want a mental picture try this, you’re in a car accelerating as fast as possible towards a destination point. You’re at a point, 0, where if you jam on the brakes you will stop short. You know that if you accelerate full then at time 1 you jam on the brakes, you will go too far. What do you do?
I started out by writing out the current situation. I wrote down the 4 Equations of Motion between time 0 and 1. In this case ts is the time step (a known amount) between 0 and 1. X is a percentage of full acceleration, what I’m ultimately trying to solve for. P is my position. Note the use of ‘#)’ as I refer to these equations later with the number and ‘)’. For these equations V1, P1, and X are unknown.
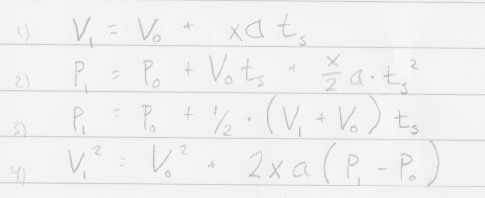
Next I decided to write the same equations between step 1 and f. 1 is now the initial state, and f is the final. We know that at time f we want to be at a full stop, so Vf is zero. We also want to use maximum deceleration, so a is now -1*a. The time between 1 and f is no longer known, so ts is now back to being t (unknown an we don’t really care to find it). In this case the only thing known is a. The only things we want to know are P1 and V1. Also note that I use squares to mark these equations.
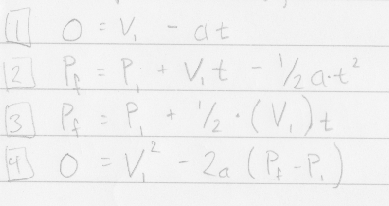
Of these equations, only 4 doesn’t include t. So I use it to solve P1 and V1 in terms of each other.
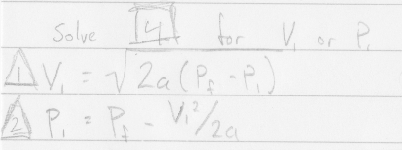
What’s next? I spent a long time and many sheets of paper plugging these two equations into the original four. In each case you end up solving V1 or P1 in terms of the other one and X, which is a great start. I ended up finding 3 equations from that. I gave up on the fourth because it was ugly. The one that ended up working for me is this one.
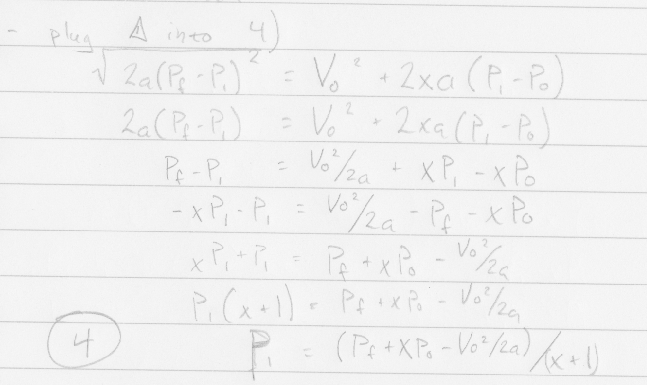
Armed with a new way to write P1 in terms of X it was a question of plugging that into the original equations to see which one was manageable. Here’s the first half of the solution
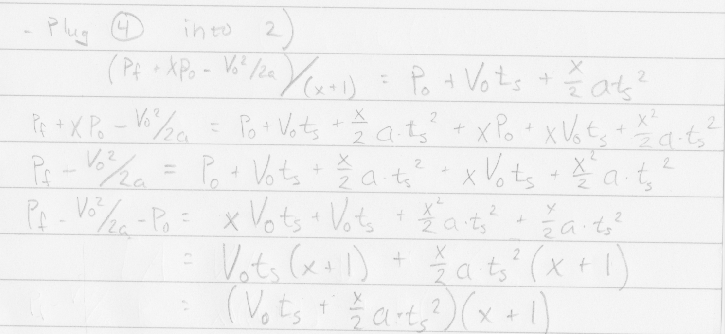
For the final part I realized that what I was staring at was basically a re-write of the old Ax^2 + Bx + C = 0. If I could get the thing into that form then I could use the quadratic equation. To make this simpler I collected some variables and gave them new names, D and E. That made the equation much more obvious.
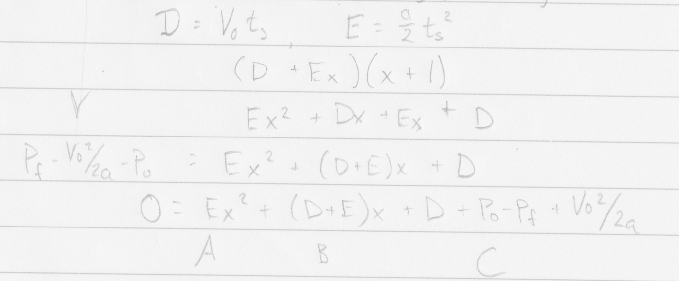
On that last line you can see the groupings for A, B, and C. Use the quadratic equation to solve for X and you’re all set. X is the percentage of the total acceleration that you want to apply.
Step 8 – The Code
Okay, that’s it. We now have enough math to solve the thing. What follows is a bit of pseudo code to show you how it all hangs together.
RigidBody Body;     // <-- what we want to move
float   DistanceToTarget;  // <-- How far we want to move
float   Time;   // <-- The time step
float   Force;   // <-- What we want to find

float TimeToTarget = TimeToMoveBy( Offset );
float TimeToStop = TimeToStop();

if( TimeToTarget < Time && TimeToStop < Time ){<
br /> // This is the case where we're really close to our target.
 // Refer to the Micro-thrust section above
 //
 if( TimeToTarget > TimeToStop ){
  Force = ForceToMoveBy( DistanceToTarget/2.0f, Time );
 } else {
  Force = ForceToStop( Time );
 }
}

else {
 // we are still far from the target.  We need to apply a bigger force.
 //
 float CurrentStoppingDistance = GetStoppingDistance( Body );

 if( CurrentStoppingDistance > DistanceToTarget ){
  // We're already past the mark.  We will definitely overshoot.
  // There's nothing we can do but apply full brake and turn
  // around later.
  //
  Force = Body.FullBrake();
 }
 else {
  // Use the Integrator to see into the future.
  // Find our stopping distance at the next time step.
  //
  FutureStruct Future = Integrate( Body, FullAcceleration, Time );
  float NextStoppingDistance = GetStoppingDistanceInFuture( Body, Future );

  if( (NextStoppingDistance+Future.Position) < DistanceToTarget ){
   // In the future we will still have plenty of room to go
   // faster.  Apply full acceleration
   //
   Force = Body.FullAcceleration();
  }
  else {
   // This is the case where we have to be careful.  Use the formula
   // I derived in the Math section (you may have skipped it).
   // A, B, C, D, and E are all described in it.
   //
   float MaxAccel = Body.GetMaxAccel();
   float CurrVelocity = Body.GetCurrentVelocity();

   float D = CurrVelocity * Time;
   float E = (MaxAccel/2.0f) * Time * Time;

   float A = E;
   float B = D + E;
   float C = D - DistanceToTarget + (CurrVelocity*CurrVelocity)/(2.0f * MaxAccel);

   float Percent = QuadraticEquation( A, B, C );

   Force = Percent * MaxAccel;

  }
 }
}
Conclusion
Well that’s the end of this tutorial. I hope you found it all enjoyable and informative. If you have any questions or comments please let me know. I’d love to hear your feedback.
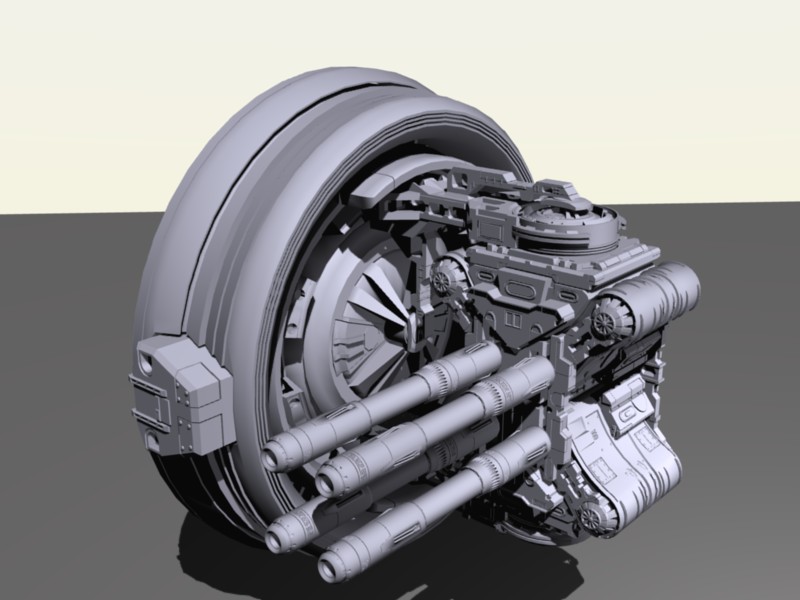
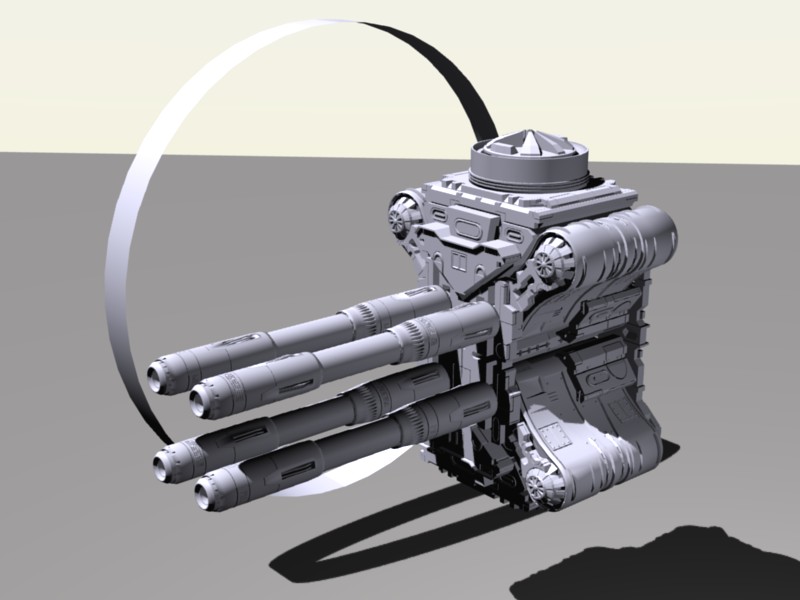
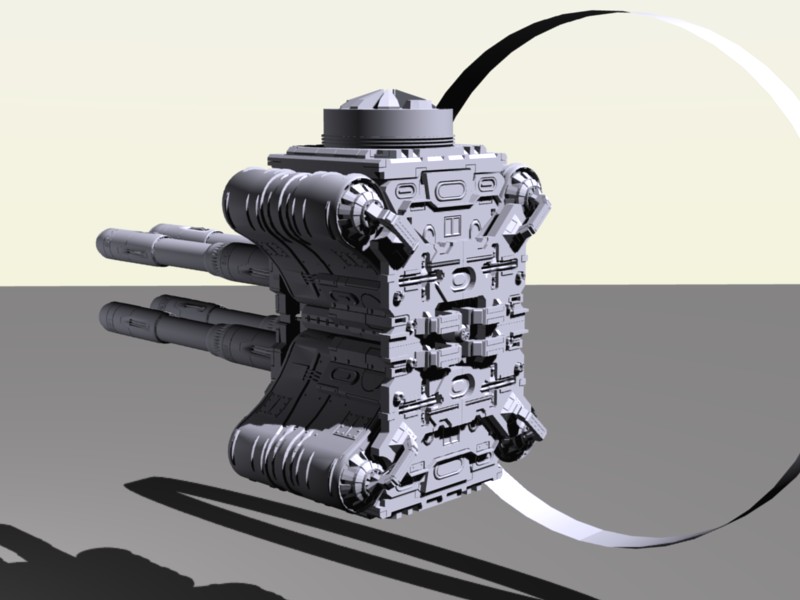
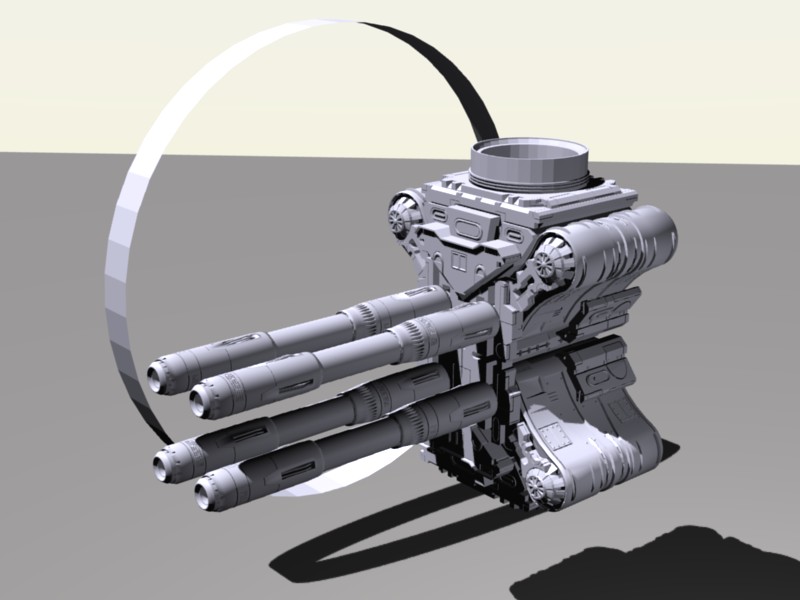
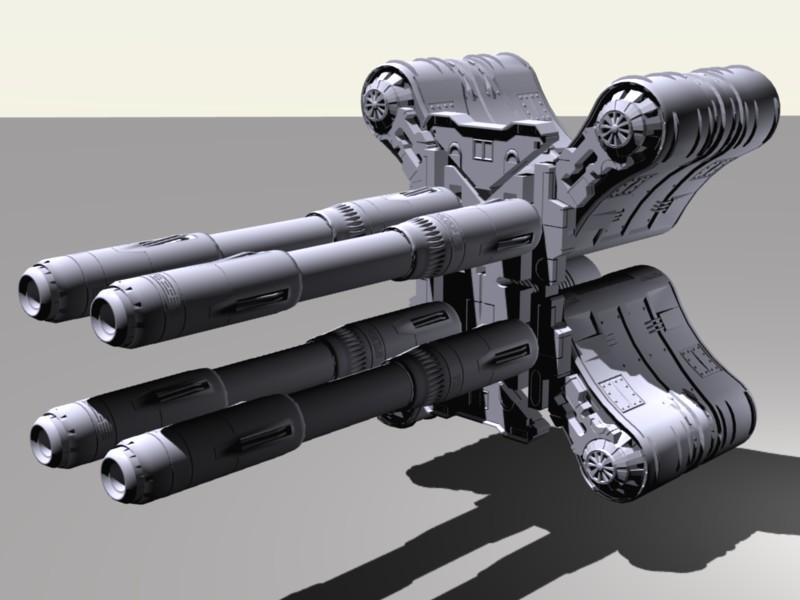
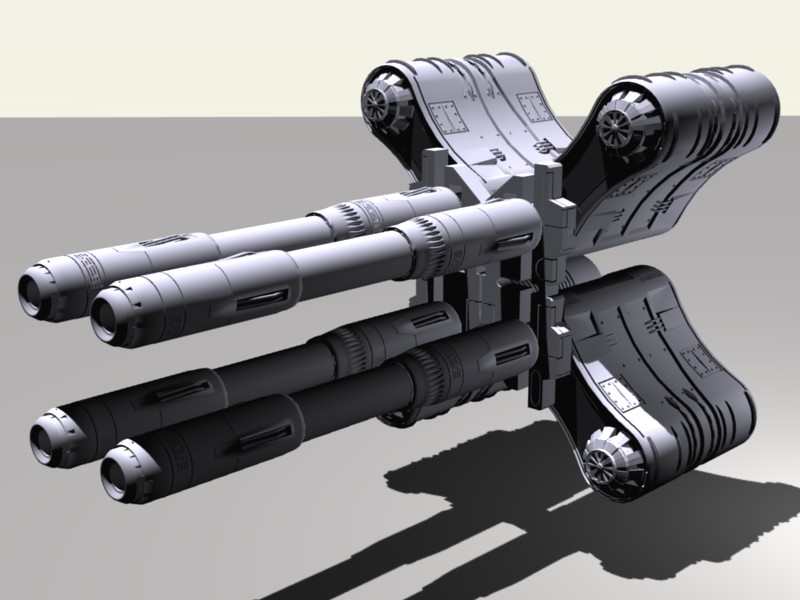
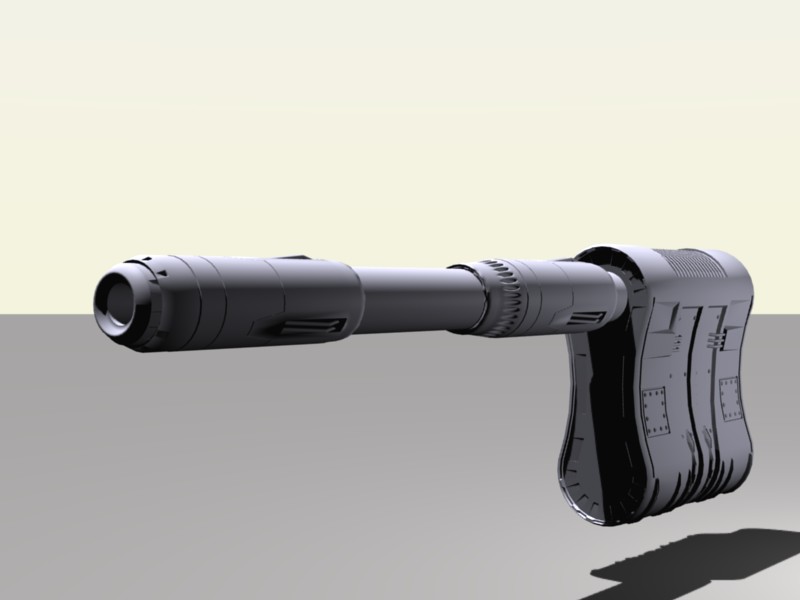
If you have some extra time, please feel free to browse around the site a bit, check out Rift. It’s my hobby space fighting game. It’s not finished (and never will be) but I like showing it to people anyway.
Thanks.